

Welcome to another edition of Planner Girls Collective. If you missed a previous edition, you can find them all here.
This week’s topic is Budget Craft Ideas. After a little search on Google, I was able to find some different Craft Ideas, I wanted to do something that was easy but still looked good. As you may know, I am a stationery addict, so I thought I would show you some stationery orientated Craft Ideas.
Envelope Tags
While browsing Google, I came across a Tag-Shaped Stamps, it is literally what it says on the tin! You can stamp onto the front of your Envelope a Tag and then write your address in there. Kind of like a Gift Tag that you put on a Present! I thought this was a good idea to create something more on the front of your Envelopes.
I thought I would tweak it so you can create your own Tags that you stick on the front, I know you can buy a packet of Tags but normally these are just one colour. By making your own though you can spice things up a little bit and have a range of different coloured Tags! I’m sure this might work out cheaper and you can personalise it.
Let’s begin with what you’ll need!
-Coloured Card
-Plain Card
-Scissors
-Pencil
-Hole Punch
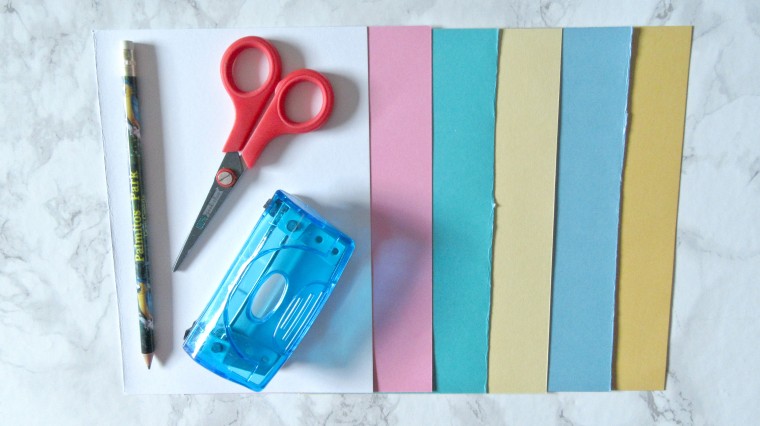
Decorations
-Washi Tape
-Stickers
-String
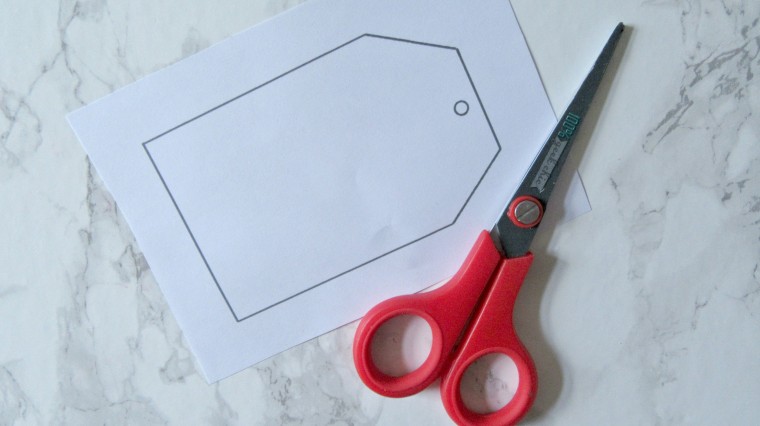
1.On your Plain Card, you need to draw your Tag shape and then cut it out so you can use it as a template. I will say though, don’t draw a too small/big shape because you need to write an address on the Tag.
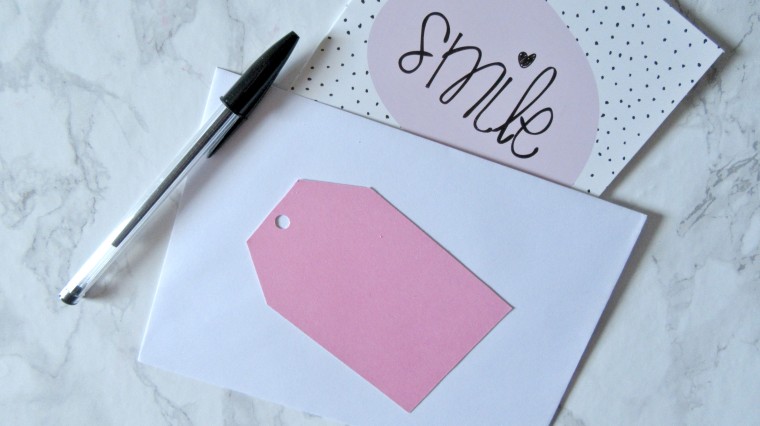
2.After you’ve got your template, you can use it as a template for your Coloured Card, then cut them out so you’ve got your Tags. To make it look like a Tag use a Hole Punch to punch a hole on the point part of the Tag.
3.You are now finished! This is a simple Tag but of course you can decorate it with Stickers and Washi Tape. I would recommend writing out your address first, so you know how much space you’ve got. You could also add string to the hole to make it more like a Tag.
Origami Bookmarks
If you know me, you’ll know that I absolutely love reading! I have a bookcase full of books and then some, with books comes bookmarks and I always seem to loose mine. While searching Google I cam across these amazing Origami Bookmarks and thought I would give them ago.
For this craft, you’ll actually only need Coloured Paper, this can either be one colour block or cute patterns! I’ve gone for some Pattern Paper as I feel this best matches me, you can also theme these to Christmas and Easter if you fancy. With Spring around the corner, I’ve gone for some cute Flower designs.
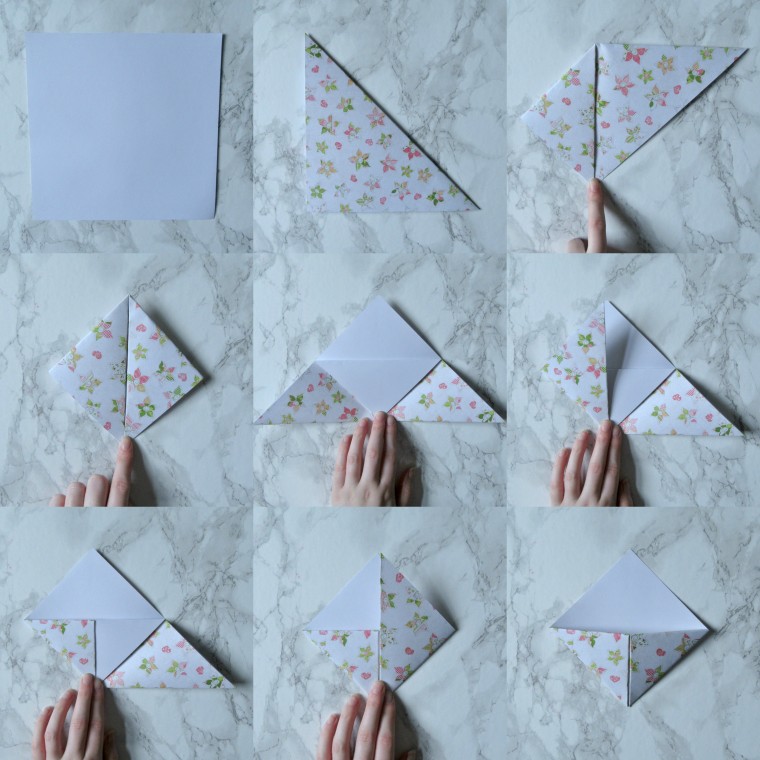
Start with a square
Fold into a triangle
Fold the left corner to the center point
Fold the right corner to the center point
Open up to a triangle again and fold one flap of the center point to the bottom
Re-fold the left corner towards the center point and tuck it into the “pocket”
Re-fold the right corner toward the center point and tuck it into the “pocket”
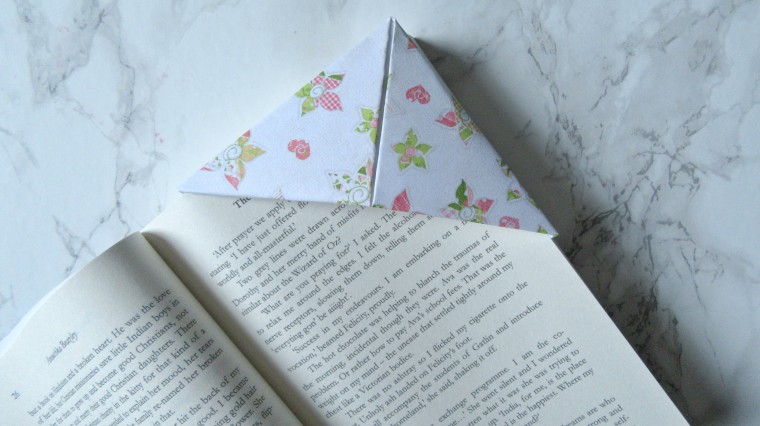
I will admit, my bookmarks are a little big for normal books, they would be perfect for my university books. I used a 8×8 Pattern Paper so I would recommend maybe using 6×6 or 4×4 if you want a bookmark for your novel. I would play around with different size paper until you get the perfect size for your books.
For other installments of Planner Girls Collective, please visit some of the amazing bloggers below and join our Facebook Group to stay up to date.
I hope you enjoyed these Craft Ideas! Do let me know in the comments if you’ve tried them out yourself. I would love to know what you’ve created and how well they turned out. I love these ideas and felt they were really easy to make.


Awesome. I love the idea of tags. I’ll have to do that for Christmas or something to make it more personalized and with holiday paper. 🙂 or really for any occasion lol.
And I’ve seen the origami bookmarks before. They’re pretty sweet. I’ve seen different designs. I don’t read (except for college) otherwise I would make them lol.
LikeLiked by 1 person
Thank youu lovely! That would look amazing if you did that! It works for anything, I was thinking of putting them on the front of letters aswell & they’re adorable aren’t they! You could probably use them for your college books, I’ve made mine a little big oops
LikeLiked by 1 person
Oooooooh yes. You just gave me another idea!! I’ll have to do it for our anniversary. Now I just need something to gift lol.
LikeLiked by 1 person
Haha that’s always the hard part! Good luck
LikeLiked by 1 person
I love this! Its so creative and I love crafts!
LikeLiked by 1 person
Thank youu lovely! You should definitely try them yourself!
LikeLike
That bookmark is such a simple idea. I’m always just finding random things to stick in my book as a bookmark. I definitely need to try this. Can’t wait to see more craft posts!
Little White Socks
LikeLiked by 1 person
Thank you lovely! I’m exactly the same, mostly it’s a receipt for something! I did make them a little big though, so I need to try with smaller paper
LikeLike
These are some great ideas. I love the tag idea!
LikeLike
Thank youu!
LikeLiked by 1 person